Expanding My Windows C Drive Without Reinstalling: A Surprisingly Smooth (and Slightly Scary) Experience
Recently, my Windows C drive was running out of space. After installing Cursor, Codex, VS Code, and various development tools, only about 40 GB remained on a 300 GB system partition.
Instead of reinstalling Windows or manually moving everything around, I decided to resize my disk partitions.
Truth be told, this was not a new idea. A few years ago, I already wanted to expand my C drive — but back then, the only Windows-native path looked far too painful: back up everything on the partitions in the way, delete them, extend C, then recreate the volumes and restore all the data. With D sitting between C and E, I had no appetite for that and eventually gave up.
This time felt different. I finally tried DiskGenius — a third-party partition manager that can move partitions and extend the system drive without wiping data. Years ago I had only looked at Windows’ built-in tools and assumed that painful backup-and-delete workflow was the only option. I simply didn’t know a tool like this could handle my layout. Glad I gave it a shot this time.
The whole process turned out to be much easier than I expected — although there was one moment where I genuinely thought I had broken my computer.
Initial Disk Layout
My 1 TB SSD was organized like this:
1
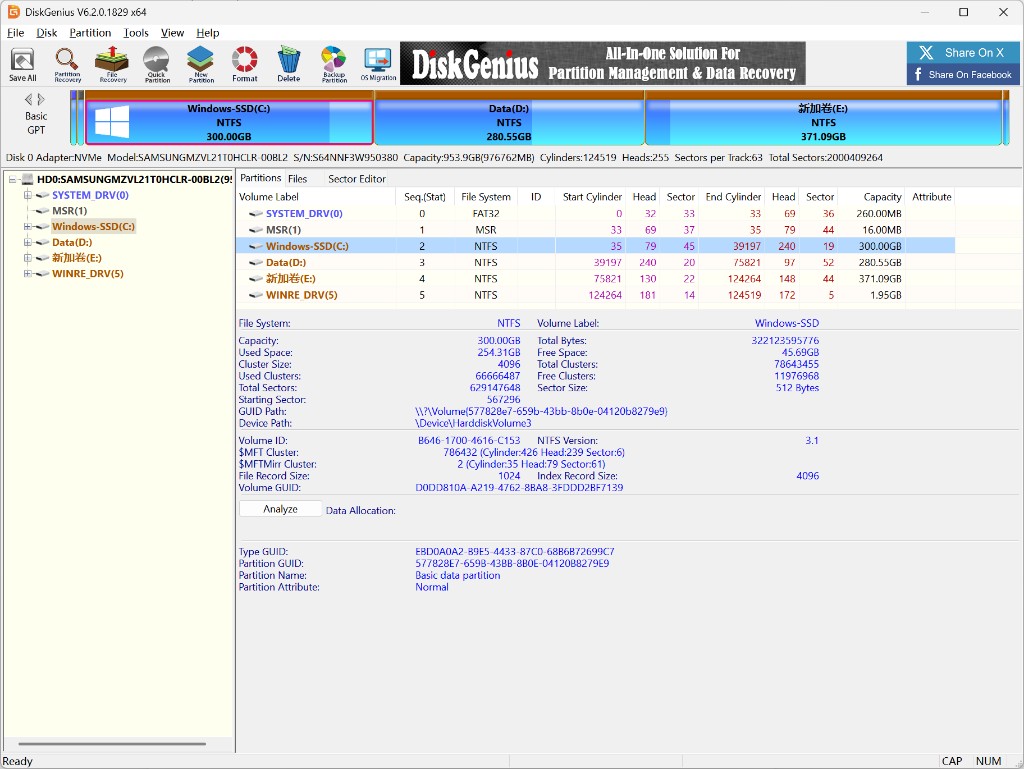
EFI | C: 300 GB | D: 280 GB | E: 371 GB | Recovery
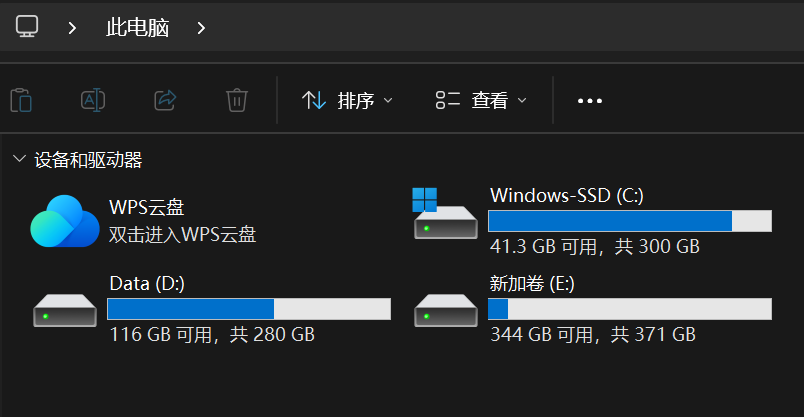
My goal was to give C more breathing room by borrowing 170 GB from the nearly empty E drive — bringing C from 300 GB to about 470 GB.
In DiskGenius, the same layout looked like this:
Why Windows Disk Management Wasn’t Practical
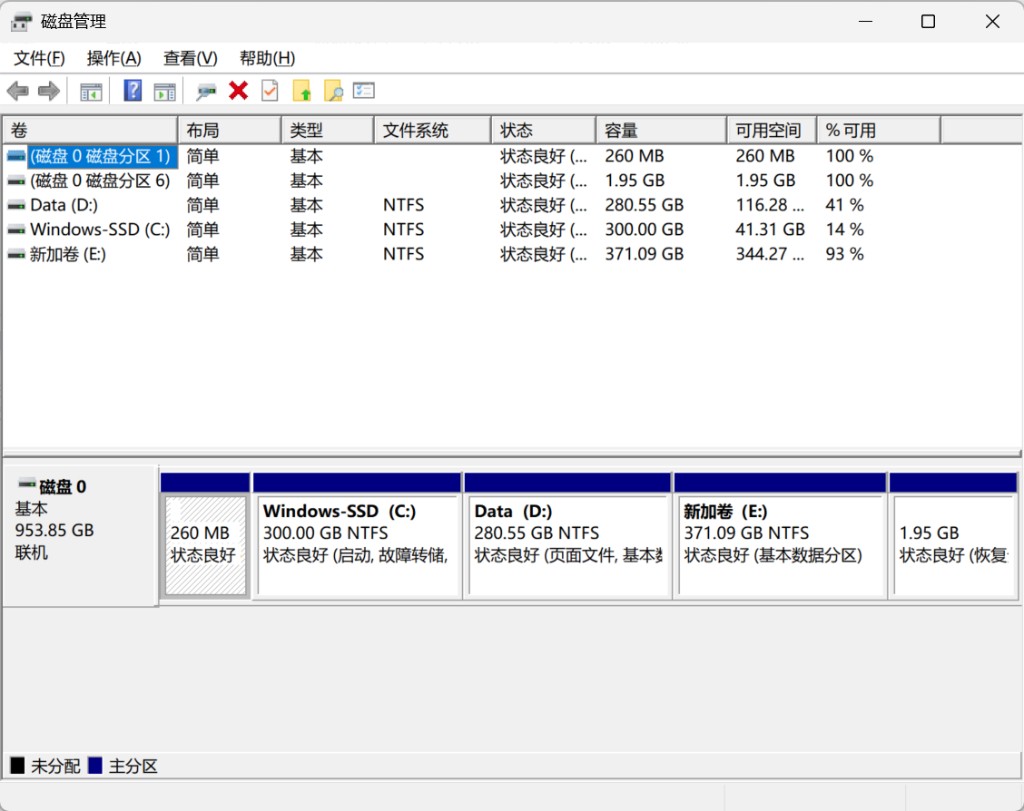
At first, I thought Windows Disk Management would be enough.
It can extend a partition — but only when unallocated space sits immediately to its right. Microsoft’s documentation states this plainly: if another volume sits between your C drive and the free space, Extend Volume stays greyed out.
Since my disk looked like this:
1
C | D | E
shrinking E would give me C | D | Unallocated | E — still blocked. D was physically in the way.
So what does Windows officially suggest? Essentially:
- Back up or move all data on the partition(s) between C and the unallocated space
- Delete those partition(s) in Disk Management — this erases everything on them
- Extend C into the now-contiguous unallocated space
- Recreate the deleted partition(s) and restore the data
That is technically doable without reinstalling Windows. But for me, with 280 GB on D plus everything on E, it meant a full backup, deleting live partitions, and a long restore afterward — hours of work and plenty of room for mistakes. Windows Disk Management also cannot move partitions; it can only shrink, delete, and extend.
That’s when I switched to DiskGenius, which can move partitions without wiping them — not just shrink and extend. Same goal, far less disruption.
Step 1: Shrink the E Partition
The E drive was almost empty, so I shrank it from 371 GB → 201 GB, freeing 170 GB.
In DiskGenius: right-click the E partition → Resize Partition → set Space of Front Part to 170 GB and choose Keep Unallocated.
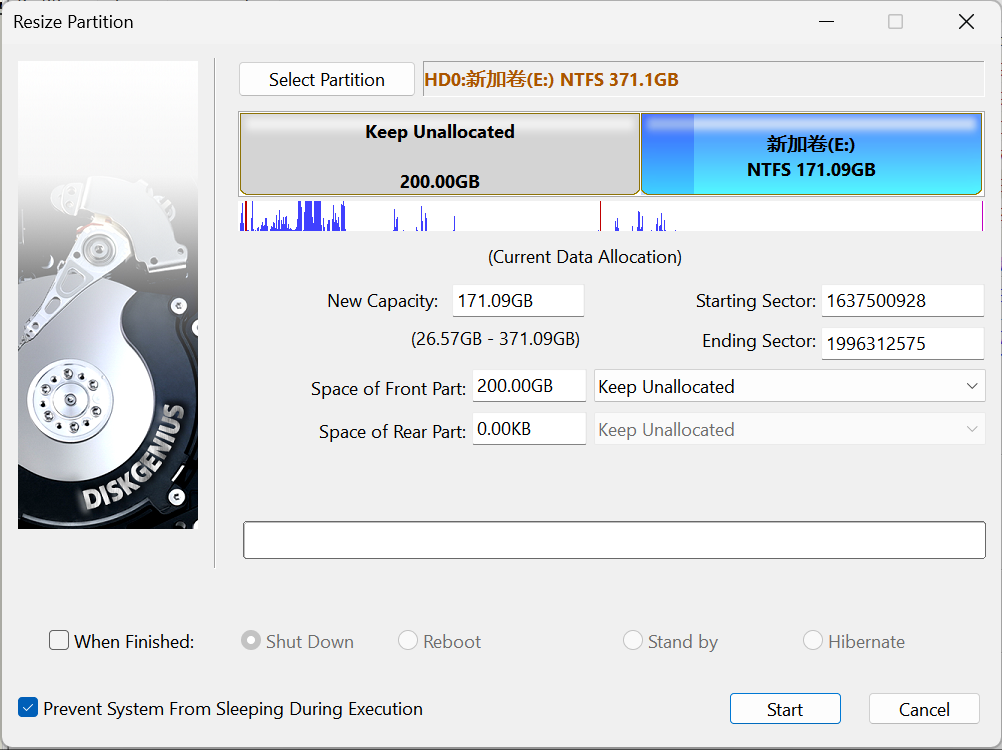
This created 170 GB of unallocated space to the left of E:
1
C | D | Unallocated (170 GB) | E
Step 2: Move the D Partition
This is the most important step.
Instead of resizing D, I moved the entire partition to the right so the unallocated space ended up next to C.
In DiskGenius: right-click D → Resize Partition → increase Space of Front Part to 170 GB (leave New Capacity unchanged). This shifts D to the right without shrinking it.
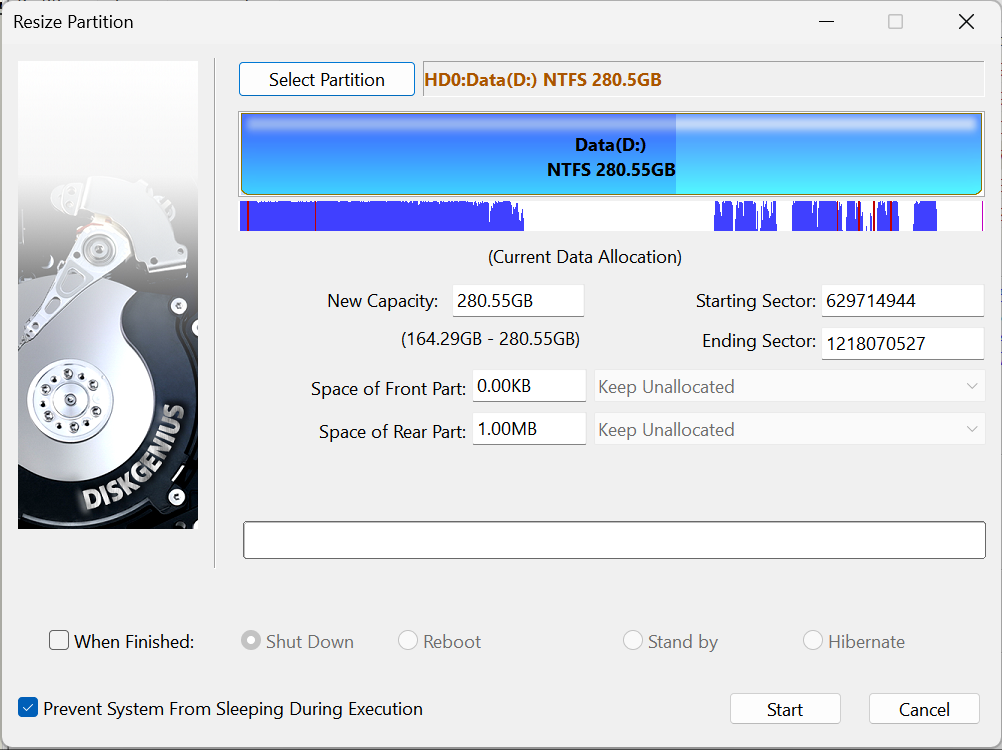
After the move, the layout became:
1
C | Unallocated (170 GB) | D | E
Now the free space was finally adjacent to the C drive — exactly what Windows Disk Management requires for extension.
Step 3: Extend the C Drive
I selected Extend Partition for the C drive and let DiskGenius absorb the 170 GB of unallocated space.
Everything looked perfect…
Until DiskGenius reported an error.
The Unexpected Error
DiskGenius displayed:
1
2
Some free clusters are marked as used in $Bitmap.
Cluster number: 38194856.
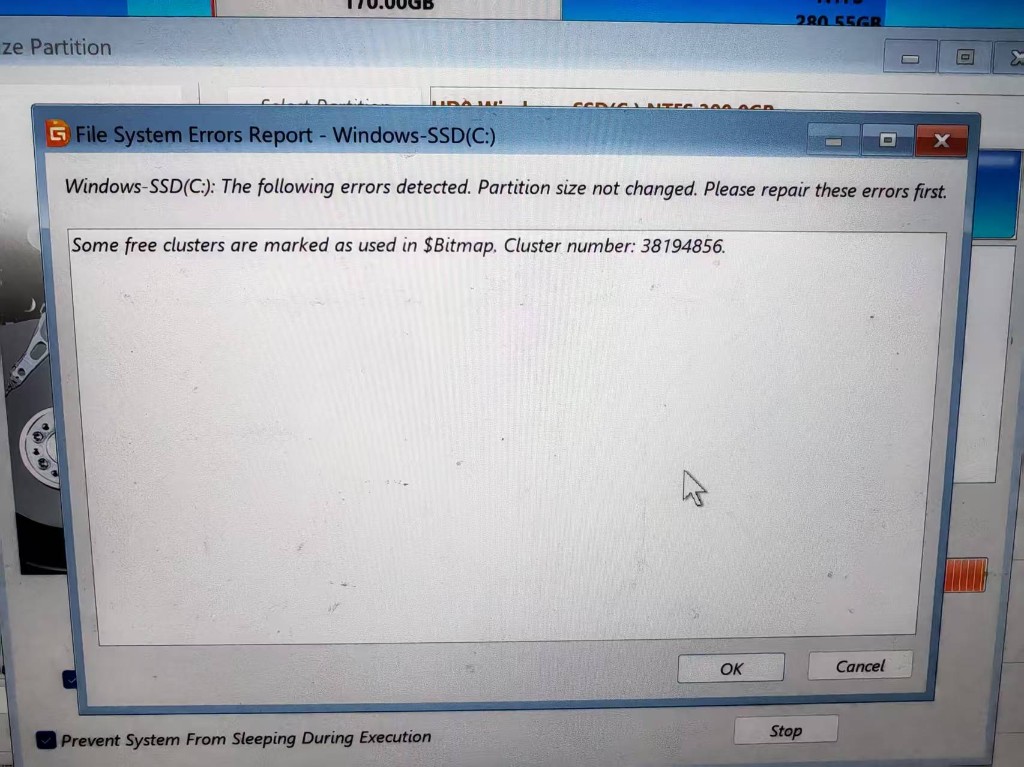
At first, I thought my SSD had developed hardware issues.
Fortunately, that wasn’t the case. This simply indicates an inconsistency in the NTFS file system metadata ($Bitmap) — often harmless, but partition tools refuse to proceed until it is fixed.
The solution was straightforward. Open Command Prompt as Administrator and run:
chkdsk C: /f
Since the C drive is currently in use, Windows responded with:
1
Would you like to schedule this volume to be checked the next time the system restarts? (Y/N)
I entered Y, rebooted, and Windows automatically repaired the file system before loading the desktop. The check took several minutes on a nearly full drive — do not interrupt it.
Once the repair finished, I ran the C drive extension again in DiskGenius. This time it completed successfully.
The Most Terrifying Moment
Then came the moment that almost gave me a heart attack.
DiskGenius required a reboot to continue moving the system partition.
After the restart…
My normal Windows desktop disappeared.
The screen showed only DiskGenius.
Nothing else.
For a few seconds, my heart absolutely sank. Did I lose all my files? Was Windows corrupted? Did I need to reinstall everything?
Fortunately, it was a complete false alarm.
DiskGenius had booted into its PreOS environment — a minimal pre-boot mode that lets it safely move and resize the system partition before Windows starts. This is expected behavior when modifying the C drive.
A few minutes later, the operation completed, the computer rebooted once more, and Windows loaded normally. My desktop, documents, source code, and applications were all still there.
That was the moment I went from panic to relief.
Final Result
The final partition layout became:
1
EFI | C: 470 GB | D: 280 GB | E: 201 GB | Recovery
Now my C drive has plenty of room for future development work — AI models, CUDA toolkits, Python environments, Docker images, and everything else that inevitably fills up a system drive.
Lessons Learned
If your disk layout looks like this:
1
C | D | E
Windows Disk Management can get you there — but only through a backup-and-delete workflow when another partition sits in the middle. A third-party tool that can move partitions, such as DiskGenius, is much simpler for layouts like this.
Before starting, I strongly recommend:
- Back up important data — even when things go smoothly, partition work always carries some risk
- Keep your laptop plugged in — moving a system partition can take a long time
- Don’t panic if the computer reboots into a screen showing only DiskGenius — that is the PreOS environment, not a broken Windows install
- Run
chkdsk C: /fif you hit NTFS metadata errors before retrying
Final Thoughts
Before this experience, resizing the system partition always sounded like something risky that required reinstalling Windows.
After doing it myself, I realized that modern partition tools have become remarkably reliable. The only moment that truly scared me was seeing my computer reboot into a screen where DiskGenius was the only thing visible — a brief false alarm that turned into genuine relief when Windows came back exactly as I left it.
If you are planning to expand your Windows system partition, I hope this walkthrough makes the process a little less intimidating.